
How to Make Paper Mache
Key Highlights
-
Making paper mache is easy. You put paper strips and paste together in layers.
-
You can make easy paper mache paste at home with just flour and water.
-
To do this, tear paper strips. Dip them in your paste. Then, put them on a shape or form.
-
Let each layer dry all the way. This is important so you get strong paper mache with no mold.
-
The drying process can take at least 24 hours. It might take more, based on how thick your paper mache is.
-
When your paper mache is dry, you can use acrylic paint to decorate it. This will give it a bright, lasting look.
Introduction
Welcome to the fun world of paper mache. People also call it papier mache. The best thing about this classic craft is how easy it be to turn basic things into a work of art that lasts. You do not need to be an expert. Anyone can try it, whether you are new or have some practice. With paper mache, you can make what you like. You get to try bowls, small or big, or make something more complex, like sculptures. There are no limits and you get to decide what you want to create. If you read this guide, you will learn all you need to start and make your own work of art with paper mache.
What Is Paper Mache?
Paper mache is a fun way to make things out of paper. The name comes from a French word that means "chewed paper." In this craft, you use layers of paper and a sticky paste. After you stick the layers of paper together with paste, let it dry. The dried paper mache is strong, not heavy, and hard.
This method is simple and very useful. You just need a basic paper mache recipe and a bit of patience. You can use layers of paper on a mold to make great shapes. Put layer after layer, and over time you will see the structure get stronger and better.
Understanding the Basics of Paper Mache
Paper mache is made using the most basic things. These are paper, paste, and a form. You start by tearing up the paper into strips. Then, you dip the strips into paper mache paste. After that, you put the paper strips onto a base form. This can be a balloon, or a cardboard shape. You overlap the paper mache layers when you add them on. Each new layer helps make the piece strong and long lasting.
The simplest way to do paper mache at home is to use things you have around. You can pick different types of paper, like old newspapers or printer paper. Just mix flour and water to make a paste. This makes it easy for anyone to start crafting with paper mache. There be no need to go out and buy stuff. You can do this craft any time, even on a rainy day or for a quick school project.
As the paste dries, the water in it goes away. The sticky part gets hard and holds the paper sheets together. This makes a shell that is light but strong, and it also matches the shape you want. With just a few layers, you can get things that feel tough and stay good for a long time.
Brief History and Common Uses
The art of papier mache has a long and interesting past. People say the name is French, but the real story starts in China during the 2nd century AD. This was just after the people in China came up with paper. At first, they used papier mache to make things like helmets and masks for special events. The craft moved from China to Japan and Persia. Then it arrived in Europe in the 17th century.
In Europe, people started to use papier mache a lot for making pretty things. The Victoria and Albert Museum says it was used for lots of items, such as dolls’ heads, snuff boxes, trays, furniture, and even architectural mouldings. Artists had to press paper pulp into a mold. This method helped them make detailed work that could be light and cheap.
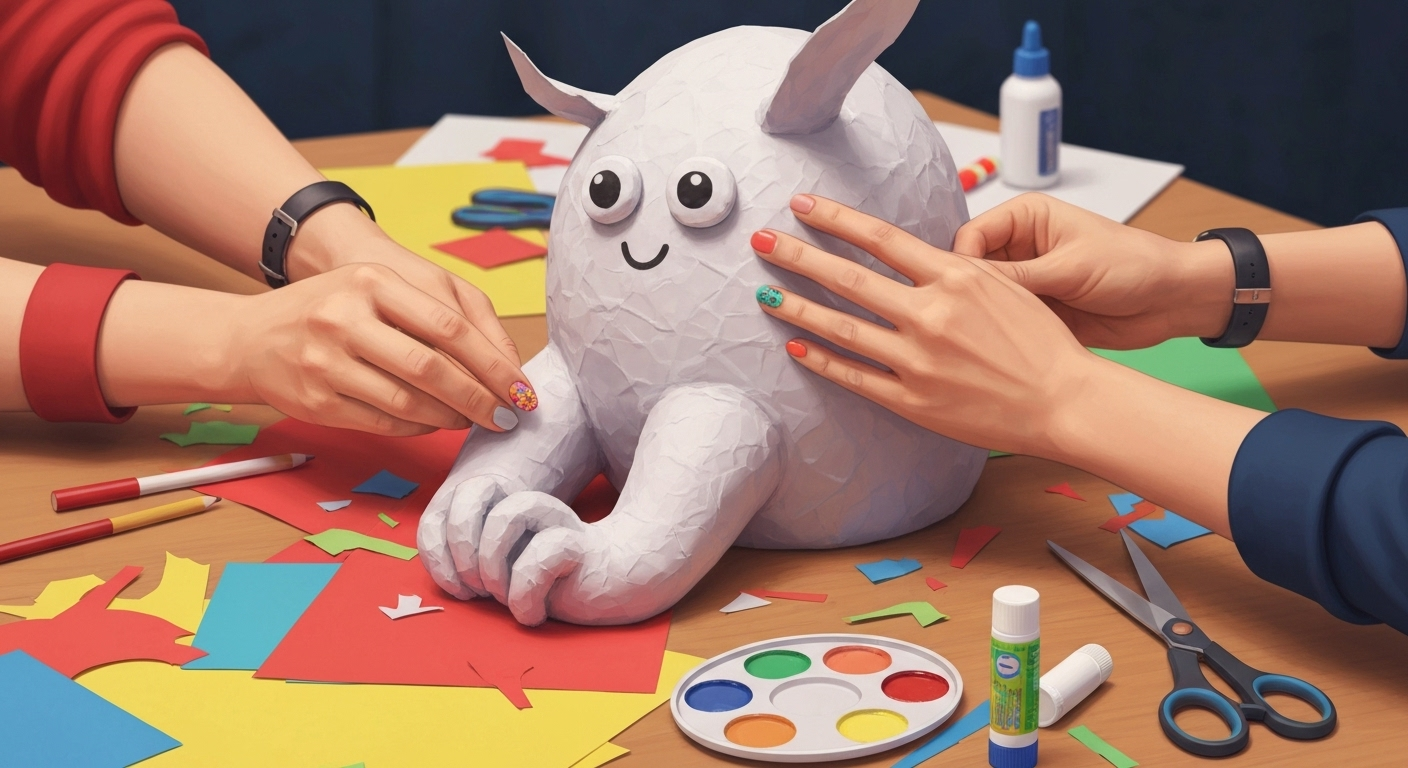
Today, people use paper mache for many creative things. You can make sculptures, masks, piñatas, decorative bowls, and big parade floats with it. Paper mache is liked by artists, hobbyists, and teachers because it can be used in so many ways. It helps them make different three-dimensional art pieces. You will find that there are almost no limits to what paper mache can do for art.
Essential Materials Needed for Paper Mache Projects
Getting started with paper mache is easy. You probably have the things you need at home already. The main items you need are some paper, glue or another sticky liquid, and a mold. Use the mold as a base to make your creation.
You will need a lot of paper for this. You can tear it into strips of newspaper or use plain newsprint. If you want a smoother look, you can use tissue paper. You also need something sticky, like paste, to hold the paper together. We will look at what types of paper and paste work best for your projects.
Types of Paper to Use
Choosing the right paper is important for paper mache. It can change the feel and strength of your finished piece. There are many different types of paper that you can use for this. Most of them are things you find around the house or get easily. The main thing to look for is paper that is not coated and can soak up water well.
The newspaper is the most popular choice for this work. You can get it cheap or even for free. It is thin, and you can tear it into strips of newspaper without much effort. A big reason people use newspaper is that it soaks up paste really well. This helps the layers stick together and makes them strong. If you want the surface to feel smooth, try using plain newsprint with no print on it.
Other papers can also be used, and each one has its own feel. They all offer something special.
-
Printer Paper: Standard printer paper is a bit thicker than normal, but you can use it. You may just need to soak the strips for more time to make them soft and easy to use.
-
Paper Towels: These are good if you want to add small details or make a more textured feel.
-
Tissue Paper: If you want a smoother finish, using tissue paper is a good idea. Put it on as the final layer to get a soft, colorful look.
-
Brown Kraft Paper: This type, which you often find in packing, looks like newspaper. It works well for lots of projects.
Choosing the Right Adhesive (Flour, Glue, or Gel Press Medium)
There are a few kinds of paper mache glue to pick from. The best option for you can depend on what you need for the project and what you like to use. If you are new to paper mache, many people say that the flour-and-water paste works really well. It is safe to use, does not cost much, and is simple to make. Just mix one part flour with two parts water to get your paste or glue.
Another good option is to use a paste made with pva glue. You can pick white glue or Elmer’s Glue for this. Mix two parts glue with one part water. It dries clearer and makes a stronger finish that can stand up to water better. There is another way you can go if you want to get artistic. Try an acrylic medium like Gel Press Gel Plate Conditioner & Adhesive. It acts as glue and also as a sealer. It dries clear and lasts a long time. A gel medium is a good choice when you use nice papers that you want to see through after drying.
To help you decide, here’s a quick comparison:
|
Adhesive Type |
Pros |
Cons |
|---|---|---|
|
Flour & Water Paste |
Inexpensive, non-toxic, easy for beginners. |
Dries opaque, can attract mold if not dried properly. |
|
PVA Glue Paste |
Dries stronger and clearer, more durable. |
More expensive than flour, can be stickier to work with. |
|
Gel Press Medium |
Dries perfectly clear, acts as a sealer, archival quality. |
Premium option, best for preserving decorative papers. |
Different Types of Paper Mache Paste Explained
Your paper mache paste is what changes weak paper into something strong. The kind of paste you use matters. It can change how strong your project is, how fast it dries, and how it looks when you finish. It is easy to make good paste for paper mache, and you can find a few simple recipes for it.
From the old way of mixing flour and water to using store-bought glues, each paper mache paste recipe gives you its own perks. The two most popular ways to make paste for paper mache projects are easy to try. Let’s look at how you can make both of these types of paper mache paste for your art.
Classic Flour and Water Paste
The classic flour recipe for paper mache paste is well-known and easy to make. A lot of people use this paste in classrooms and at home because it is cheap and you can find the ingredients in your kitchen. To make the paste, use one part purpose flour with two parts water. For instance, mix 1 cup of flour with 2 cups of water. This flour recipe helps you get a good paper mache paste every time.
To get it ready, slowly pour the water into the flour. Whisk the mix all the time and keep doing this so you do not get lumps. You want the mix to feel like thin pancake batter. A little salt, about one tablespoon, can be added in some recipes. People feel this may help stop mold from forming. This works well in places where there is a lot of moisture or if it will take more time to dry.
This easy paper mache paste can be made in two ways. You can make it cooked or uncooked. The uncooked option is a bit faster. If you have time, you can heat the mixture on the stove or in the microwave. Heating will help release the starch from the flour, so the paste will be stronger. Before you use the paper mache paste, make sure you let it cool down.
PVA Glue Paste and Alternatives
For a finish that can be stronger and keep water out better, a pva glue paste is a good choice instead of the flour recipe. A fast way to make this paste is to mix white pva glue, like Elmer's, with water. A simple way to start is to use two parts glue and one part water. You can make the pva glue paste thicker or thinner as you want. It should be thin so you can use it to cover paper strips nicely, but not too thin or runny.
This kind of paste dries much clearer than flour paste. That is good if you use white paper or fancy paper for your last layer. You can also use Mod Podge right out of the jar. It works as both glue and a sealer. This way is fast because you do not need to mix anything.
For projects in which you need maximum strength, like when you make masks or sculptures that need to be sturdy, you can use wood glue. A good choice is Titebond III wood glue. It sets up fast and gives a bond that is very strong, more than other glues like those with water. While wood glue can cost more, it is a great option when you want the most strength for your work.
Beginner’s Guide: How to Start Your Paper Mache Project
Are you ready to begin your first paper mache project? The main thing to think about for a good result is, you need to get everything ready before you start. This means you should take some time to collect all the tools that you will use. Try to make a space just for your work, so you feel ready when you start getting your hands messy with paper mache.
Getting set up at the start will help the whole process be easier and feel more fun. When you pick out your molds and learn some safety basics, you get ready to make the most of your project. This helps you feel more organized. Later, we will also talk a bit about how you can try a paper mache clay recipe if you want to do even more.
Gathering Tools and Setting Up a Workspace
The first thing you need to do before starting any paper mache project is to get things ready. Pick a spot to work that you do not mind if it gets dirty. A garage, basement, or just a table with a plastic cloth or some old newspapers on top will work well. It is also good to have some fresh air in the space. This helps with the drying process of paper mache.
When your space is set up, put all your tools and supplies where you can get them easily. If you have everything ready, you can work without stopping. Use this checklist to see what you need:
-
Get the paper you chose and tear it into strips.
-
You will need a bowl for the paper mache paste.
-
A whisk or a spoon will help you mix the paste.
-
You need a base form or mold, such as a balloon, a cardboard box, or a wire frame.
-
A paintbrush is good for putting the paste on smaller parts, but you may not need it every time.
-
Be sure to cover your workspace to keep it safe from messes.
Now that you have your tools and materials ready, it’s time for the best part. A clear workspace and having all your supplies close by will help you work faster. This also makes the job feel better and more fun.
Safety Tips for Kids and Adults
Paper mache is a good and safe way for you and others to have fun. It works for all ages. But you need to follow some tips to make sure all goes well. A big mistake is when people do not let each layer dry in the right way. If you do that, it could cause mold to grow. Drying paper mache in the right way is very important.
When you work with kids, always use non-toxic materials. The U.S. Consumer Product Safety Commission says you should pick art items with the label "non-toxic," especially when children are making crafts. A simple flour-and-water paste is a good and safe choice for them. Always watch kids when they are doing crafts.
Tips & Safety Panel
-
Protect Your Workspace: Put a plastic sheet or some newspaper on the table to make it easy to clean up after you work. It is also a good idea to wear an apron.
-
Ensure Proper Drying: Let each layer dry all the way before putting on another one. Put your project in an area where air moves well. You can use a fan to make the drying go faster.
-
Avoid Air Bubbles: Smooth down each strip of paper to get rid of air bubbles and any extra paste. This helps you get a stronger and smoother finish.
-
Use a Release Agent: If you use a hard mold, put a thin layer of Vaseline or cover it with plastic wrap. This keeps your project from sticking to the mold.
-
Work in Thin Layers: Do not put on too many wet layers at once. This can make your project weak and soggy. Two or three layers at one time is best.
Step-by-Step Guide to Making Paper Mache
Now that you have everything ready, you can start making your paper mache project. This guide shows you each step, beginning with how to mix your paste. It helps you go through all the steps, so you can finish and add the last details to your new paper mache creation.
We will look at how to get your materials ready, build your form, and put on the paper strips. Doing these basic steps will help you learn the way to put on paper mache layers. This will make the finish strong and nice to look at. Let's begin!
Step 1: Preparing Your Paste
The first thing you need to do is get your adhesive paste ready. You can pick a flour recipe or use glue. The main thing is to make sure the paste has a smooth feel and is easy to work with. If you choose the usual flour and water paste, start by putting flour in a bowl.
Slowly pour the water in while you stir with a whisk. A whisk works well for this, because it helps get rid of any lumps. You will see the mix get smooth as you keep stirring. If you see lumps, keep going until they are gone. If you have an immersion blender, you can use that to make it even faster and easier.
You want your paste to have a consistency like thin pancake batter or thick cream. If the paste is too thick, it will be hard to put on and won’t soak into the paper how it should. If the paste is too thin, it will run and won’t stick things well. It does not have to be perfect right away. You can add more flour or water to make the paste feel right. Use pancake batter as a guide to get the right consistency.
Step 2: Prepping and Tearing Your Paper
With your paste good to go, you now need to get your paper ready. You can use things that people have at home. Try newspaper, printer paper, or the brown paper that comes from packaging. The main thing is to tear the paper into strips, not cut it with scissors. When you tear it, the pieces have soft and feathered sides. This helps them blend in better, while using scissors gives hard lines that do not work as well.
The size of the strips you use will depend on the size and detail of your project. If you’re working on a general project, it’s good to start with strips that are about 1 inch wide and 6 inches long. If your work is smaller or has more detail, then you should go with strips that are shorter and less wide. For bigger shapes that do not have much detail, you can pick wider strips. This helps you cover the surface faster.
Get a big pile of paper strips before you begin. This helps you stay on track and you do not have to stop to tear more paper with glue on your hands. If you have some strips that are different sizes, it will be easier to cover large spots and small curved areas too.
Step 3: Building Your Base Form (Molds & Common Shapes)
The base form, also called the armature, is the skeleton for your paper mache project. It gives you a shape to work on and build. When you want to start with paper mache, one of the first things you need to do is pick a good mold. For this, you can use many things from your home. Everyday items often work well as the base for making paper mache.
Balloons are the most popular base that people use. They are good when you want to make round things like masks, bowls, or piñatas. Cardboard boxes, plastic bottles, and crumpled newspaper held by tape work well too. These help you build other shapes that may be more tricky. If you want your sculpture to have more detail, you can use chicken wire to build a frame.
Before you put on the first layer of paper mache, you need to get your mold ready. If the mold is something like a plastic bowl or a balloon, it is not porous. It is a good idea to put something on it, so the paper mache does not stick. A thin coat of Vaseline or a wrap of plastic can help. This will let you take your paper mache off the mold easily after it dries.
Step 4: Layering Paper and Paste
Now comes the fun part: adding the layers! If you want your paper mache to be strong, you need to put thin layers of paper on with your paste. Take one strip of paper at a time. Dip it in the paste, and make sure it is covered completely.
As you pull the strip out of the paste, use your fingers to wipe off any extra paste. The paper should be wet but not dripping. If there is too much paste, your project may get soggy and take more time to dry. Put the wet strip onto your form. Press it down with your fingers and smooth out the paper. This helps remove wrinkles and air bubbles.
Keep going with this process and make sure each strip is set a bit over the last one till the whole form is covered. For a stronger structure, switch up the direction for each new layer. Put one layer going the width-way, then the next one going up and down. Try to apply about two to three layers of paper. After that, let it all dry completely before you add more layers of paper. This way, you will get a smoother finish that is much tougher.
Step 5: Drying, Smoothing & Sealing Your Creation
Patience is key when working with paper mache, especially in the drying process. How long it takes for paper mache to dry mostly depends on the thickness, the humidity in your area, and how much airflow there is. In most cases, you will need to give it at least 24 hours for thin layers to dry. If you touch your project and it feels cool, it is still damp inside.
Once the thing you made is dry, you can work on getting a smoother finish. If you see rough parts or bumps, you can use fine sandpaper to gently sand them down. After you sand it, use a cloth to wipe away the dust before going to the next step.
To keep your work safe and ready for painting, you can use a sealant. A coat of gesso gives you a smooth and white surface that works well with acrylic paint. You can also add a layer of mod podge or a clear acrylic sealer to protect what you made and make it look finished. After everything dries and is sealed, your project is set for more decorating.
Creative Project Ideas and Monoprinting with Gel Press
After you learn the basics of paper mache, you can do even more with your projects. Try making your own pretty paper for your art. This is where monoprinting with a Gel Press plate helps. Instead of using just newspaper or printer paper, you can think about putting special patterns you made onto your work. A Gel Press makes it easy to add nice prints to thin paper. This thin paper works well when you put layers on your paper mache creations.
Just put acrylic paint on your Gel Press plate. You can make textures or patterns and then press a piece of tissue paper or thin paper to pick up the print. Use these custom sheets as the top decorative layer for your paper mache work of art. This will turn a simple craft into something special. With this way, you can make every sculpture and craft unique and it will stand out.
Fun Crafts, Sculptures, and Classroom Activities
Paper mache is a great way to make things. You can use it for crafts, sculptures, or work in the classroom. There is so much you can do with it. What you make with paper mache can be useful or feel nice to look at. Papier mache is good for three-dimensional art. Your ideas matter most with it.
The great thing about paper mache is that it is very easy to work with. You can use it as a fun project in the classroom or at a workshop. A simple paper mache glue will help everyone make something new. You just need some paper mache glue and old paper or other things you have lying around the house. People can work together to build big sculptures, or they can each make their own small projects. Here are a few ideas to help you get started:
-
Decorative Bowls: You can use the mold of a bowl or a balloon to make paper mache bowls. Paint them by hand to make them special for trinkets.
-
Animal Sculptures: Build the shape of your favorite animal with wire or crumpled paper as the mold. Cover it with paper mache and let it dry.
-
Holiday Ornaments: Make custom ornaments with paper mache. To do this, use small balloons or cookie cutters for the mold. You can make them for any holiday.
-
Masks: A paper mache mask is a classic project. This is good for Halloween, for parties, or for shows.
You can make anything you want, from fun shapes to things you can use in your home. So get your materials ready and let your ideas come to life!
Conclusion
To sum up, making paper mache is a fun and creative thing that people of any age can do. You just need to know about the right materials, follow the steps, and keep safety tips in mind. This guide tells you all of that, so you can feel sure when you start your own paper mache projects. You can make simple shapes or try out more detailed designs. The things you can make with paper mache are endless.
Also, think about using Gel Press products in your projects. These tools help you add special monoprinting touches to your art and can make your paper mache look even better. If you feel ready to start, check out our Gel Press products. We have the items you need to start creating your own paper mache pieces today.
Frequently Asked Questions
What is the easiest way to make paper mache at home?
The quickest way to make paper mache at home is by mixing all-purpose flour with water, using the same amount of each. Combine them until you get a smooth paste. Tear up newspaper or other scrap paper into strips. Dip every strip into the paste. Put each strip over an item, like a bowl or balloon, that you want to cover. Do several layers to make it strong. Let it dry all the way when you are done before you paint or decorate with it.
This easy paper mache recipe uses things you already have at home. You will only need flour, water, and paper. It is the fastest and most low-cost way to make crafts that last, like masks, piñatas, or bowls for decoration. Anyone can try this paper mache recipe, even if you are new to making crafts.
Can you explain the basic recipe for paper mache paste?
The basic paper mache paste recipe is easy to make. You only need flour and water. To start, take equal amounts of flour and water and put them in a bowl. Then, use a whisk to mix them well. You want the mixture to be smooth with no lumps. This simple paste is safe and natural. It is good for most paper mache craft projects.
For a stronger and long-lasting paper mache paste, try using white PVA glue with water. Mix the glue and water in a 1:1 ratio. This paste is good for paper mache projects that need to be more solid. It also gives the work a smoother finish. Using this glue-based paper mache paste will help your projects last longer and look better.
Tip: If the paste looks too thick, you can add a bit more water. If it is too runny, you can sprinkle in more flour or glue. Keep doing this until you get the right consistency for dipping and layering paper strips.
This easy recipe helps you make a strong glue. You can use it for masks, piñatas, sculptures, and kids’ crafts. The best part is you only need things that most people already have at home.
What everyday materials do I need for paper mache?
To make paper mache at home, you do not need a lot. Just use a few everyday things.
-
Paper – You can use torn or cut strips of newspaper, printer paper, or any scrap paper.
-
Paste – Make homemade paste with flour and water, or mix white PVA glue and water in equal parts.
-
Water – Use water when you mix and change the paste consistency.
-
Bowl – A bowl be useful for mixing and holding your paste.
-
Scissors – Use scissors to cut paper into strips.
-
Work surface or base form – Pick a base. A balloon, a bowl, some cardboard, or any shape can work to layer the paper onto.
You can start making paper mache crafts like masks, piñatas, or simple home decor with things you find in the house. Most of the things you need for paper mache are cheap, easy to get, and simple to use. That is why paper mache is a good DIY project for anyone, even if you just want to try something new or fun.
How long does it take for paper mache to dry completely?
Paper mache needs about 24 to 72 hours to dry all the way. How fast it gets dry depends on the layers, how thick the paper is, and the air in the room. It will dry faster in a warm and dry place with good air moving around. If the air has a lot of water in it, the layers will need more time to get hard. For the best way to make your paper mache ready, keep it in a room that has air moving. Do not stack it or cover it until you feel that it is hard and dry everywhere.
Are there different types of paper mache glue, and which one is best for beginners?
Yes, there are several kinds of paper mache glue you can use.
-
Flour and water paste is the easiest and cheapest way to make paste. It works great for beginners and for kids’ crafts.
-
PVA glue, also known as white school glue, can be mixed with water. This makes the paste stronger and gives a smoother finish. It is good when you need glue for detailed or strong projects.
-
Specialty mediums, like gel press medium or wallpaper paste, are best for projects that need to be extra strong or need to look more professional.
For people who are new, the flour and water paste is the best way to start. This paste does not cost much, is safe, and you can make it at home using things you have every day. When you feel better about using it, you can try glue-based pastes for something stronger or if you want a smoother finish.
Can you share tips for making stronger and more durable paper mache?
To help your paper mache projects last longer and be stronger, try these tips:
-
Add multiple layers – If you use more paper layers, your project will be stronger.
-
Use strong adhesives – A flour-and-water paste is fine for easy crafts. If you want a tougher bond and a smoother finish, mix PVA glue with water.
-
Let each layer dry fully – Do not rush the drying process. If the layers do not dry all the way, it can make the work weak. Give it at least 24 hours before you put on another layer.
-
Incorporate fabric or fibers – You can give extra strength by adding strips of cotton cloth, tissue paper, or a paper towel to your base. This can help stop cracking.
-
Seal the finished project – When you finish, use a coat of varnish, Mod Podge, or acrylic sealant. This help to make the project sturdy and protects it against water.
These steps help your paper mache projects last longer. They will be good for decorations, masks, piñatas, and many other strong crafts. This way, your work will stay in good shape with time.
What are the basic steps to start a paper mache project?
Starting a paper mache project is easy. Anyone can do it, even if you are new to it. Here are the simple steps:
-
Gather materials – You will need newspaper or scrap paper. Get some scissors, a mixing bowl, and your adhesive, which can be flour paste or pva glue.
-
Prepare your workspace – Put some plastic, parchment paper, or an old cloth on your table to keep it clean. Make sure there is good airflow. This helps with drying.
-
Make your paste – Mix the same amount of flour and water, or pva glue and water in a 1:1 ratio. Stir the mixture until it is smooth.
-
Tear paper into strips – Tearing gives the paper easy, soft edges that blend well. You do not need to use scissors for this.
-
Choose a base or mold – You can pick a balloon, bowl, cardboard, or a wire shape as your base or mold.
-
Dip and layer – Dip each strip in your paste or pva glue. Wipe off the excess paste, and place the strip over your mold. Overlap the strips as you go.
-
Dry thoroughly – After each layer, let your project dry well. Make sure it is completely dry before you paint or decorate it.
With these steps, you can start to make masks, sculptures, piñatas, or decorative bowls at home. It is simple to do, and you will feel good about what you create. If you want something fun for a day, this is one way to get it. Give your own touch to each piece and see how it comes out.
Is it possible to use paper mache for making sculptures or decorative crafts?
Yes, paper mache is great to use for sculptures and crafts. The material is not heavy, so it is easy to work with. It does not cost much, and you can use it in many ways. You can mold paper mache into many shapes. This makes it good for making different kinds of art or decorations.
-
Artistic sculptures with the kind of details that stand out
-
Masks and piñatas to be used in parties and festivals
-
Home décor items such as bowls, vases, and wall art fit well in your space
-
Educational projects that children, classrooms, and kids’ crafts can all use
When the paper mache projects dry and you paint them, they can last for a long time. These projects also look great. This is why many people who like to make things, and even professional artists, like paper mache.
Are there any quick methods to prepare paper mache paste?
Yes, you can make paper mache paste at home in two quick and easy ways.
-
Flour and water method – Take the same amount of flour and water in a bowl. Mix them well until it gets smooth. This paste is safe and good for kids or anyone new to making crafts.
-
PVA glue and water method – Mix pva glue and water in equal parts. Stir until it blends well. This glue gives a stronger paste. It works well for projects that you want to be tough or strong, like sculptures.
Both ways can be set up in just a few minutes. They give good sticking power for paper strips, so your projects will be strong and last a long time.
What mistakes should I avoid when making paper mache?
When you start to make paper mache, there are some mistakes that a lot of people have. These mistakes can change how your project looks when it is done.
-
Using too much water in the paste – When you add a lot of water, the mix gets too thin and weak. This can make the paper sag and not hold up well.
-
Not adding enough layers – If your project is thin, it can crack or fall apart. Try to have several layers that overlap. This will help it be strong.
-
Skipping proper drying time – If you do not let it dry enough, you might get mold or warping. It can also feel weak or not good in the end.
-
Neglecting workspace prep – Not covering your table or floor can lead to lots of mess. You do not want to have accidents or hard-to-clean glue all over.
-
Using scissors instead of tearing strips – When you use scissors, it leaves hard edges. Tearing strips by hand helps them stick and blend better for a smoother layer.
If you stay away from these mistakes, you will make paper mache things that feel stronger and smoother. They will also last longer.
How do you make paper mache at home?
Making paper mache at home is easy and does not cost much at all. This is a simple guide to help you make paper mache step by step.
-
Prepare your paste – Mix the same amount of flour and water until it gets smooth. Or you can mix some pva glue with water if you want to make it stronger.
-
Tear paper into strips – Newspaper or scrap paper is best to use for this.
-
Choose a base form – A balloon, bowl, piece of cardboard, or wire mold will work for your project.
-
Dip and layer – Put your paper strips into the paste. Take off any excess paste. Lay the strips over your mold and make sure they overlap.
-
Dry between layers – Give each layer at least one day to dry. This will help stop mold or sagging.
-
Seal and decorate – When your work is fully dry, you can paint it. Keep it safe with varnish or Mod Podge to make it last longer.
This way is great if you want to make sculptures, masks, piñatas, or home crafts. You only need things you already have in the house.
Is paper mache with glue or flour better?
Whether you use glue or flour for paper mache will depend on what you want for your project.
-
Flour and water paste – This paste is cheap and does not have anything that can hurt you. You can make it with things from the kitchen. It is good for kids’ crafts, school art, or simple decorations.
-
Glue and water paste (PVA glue) – This kind of paste made with PVA glue is stronger. It feels smoother and it will dry faster than flour paste. This is the best pick when you need to make sculptures, masks, or anything that needs to last and look nice after drying.
If you want to craft with children or spend less money, the paste you make with flour works well. If you need things to last, look good for a long time, or look professional, use pva glue. This glue is a better choice for the job.
What are the 4 ingredients for paper mache?
The four things you need to make paper mache are:
-
Paper – You can use newspaper, printer paper, or old pieces of paper that are ripped into thin strips.
-
Adhesive – Use paste made from flour and water, or mix glue with water to make your paste.
-
Water – Add water to help you get the right consistency for your paste.
-
Base form or mold – You can use things like a balloon, bowl, a piece of cardboard, or some wire to help shape your project.
Together, these ingredients help you make strong things that are easy to change for your crafts. You can use them for décor or other art projects.
What is the best mix for paper mache?
The best paper mache paste you can use will be different, depending on if you use flour or glue.
-
Flour recipe – Mix one part flour with two parts water until the feel is smooth. This will make a soft paste with no lumps. You can use it for most starter or easy projects with the recipe. The paste comes out good for gluing things together.
-
Glue recipe – Put together equal parts PVA glue and water to get a firmer and easier to move paste. This glue works better and sets quicker. The surface you get after it dries is smooth and nice for painting.
Trying out new ratios for your paper mache mix can help give your projects different looks and feel. You get to change how strong and flexible it is. This means you can make your paper mache just the way you want for your needs.