


How to Use Gel Press Plate for Stunning Texture Prints
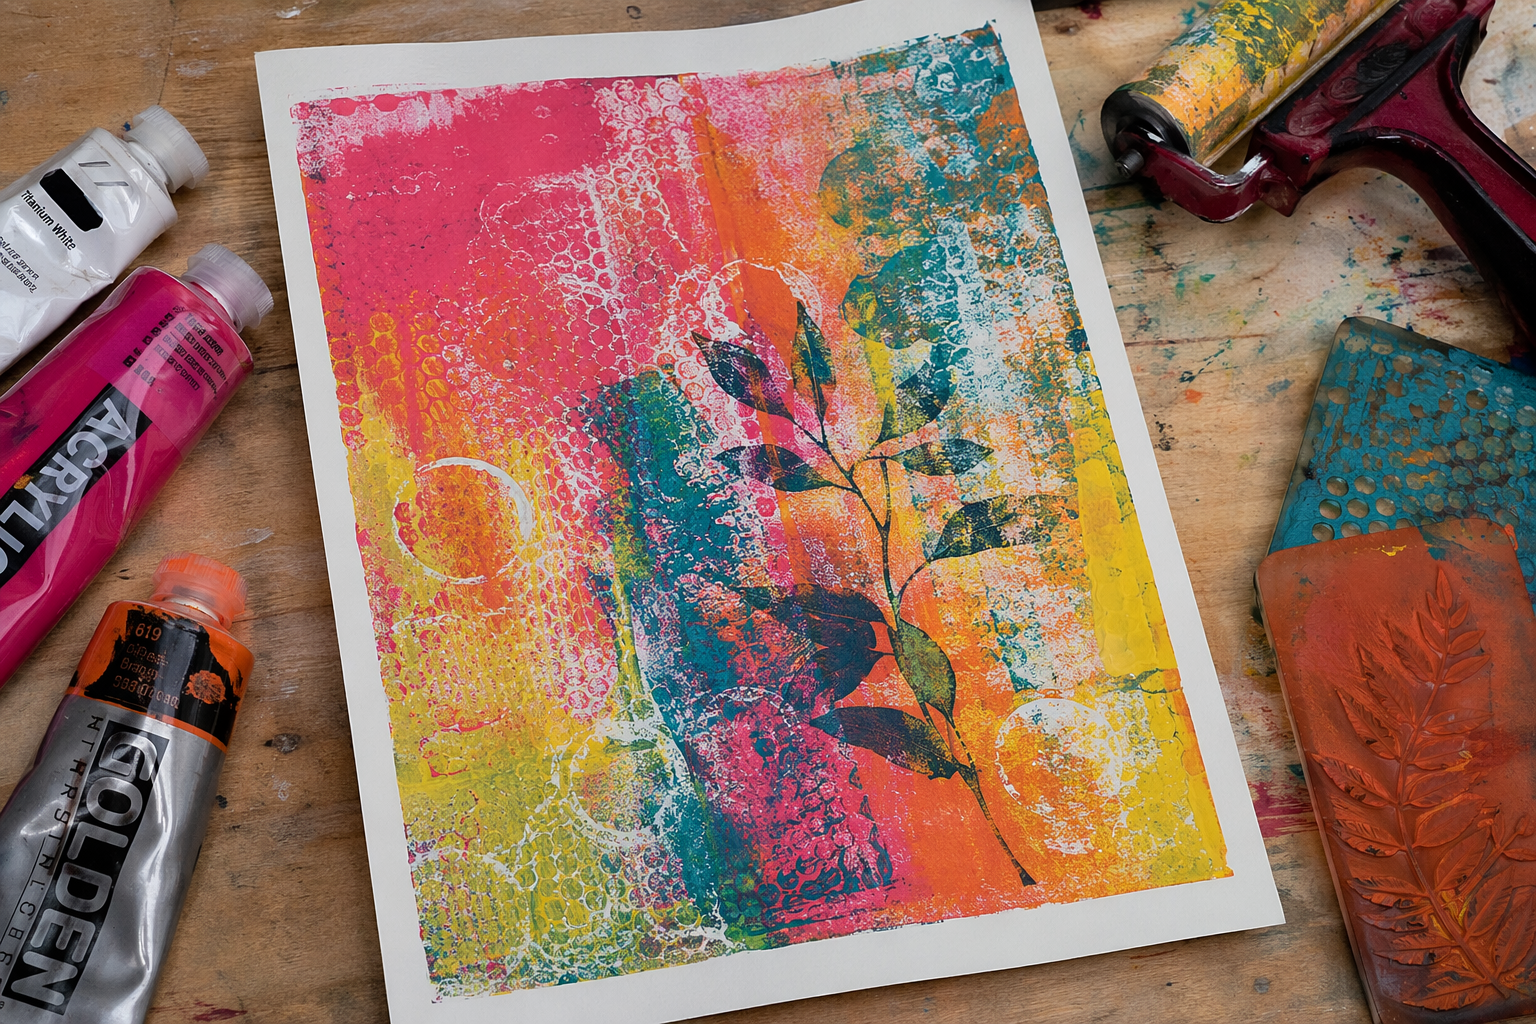
Key Highlights
-
A gel plate is great for gel printing. It is simple to use, gives you many options, and is fun for people at any skill level.
-
Gel Press plates work with acrylic paint. You need paper and a soft brayer to get the best result.
-
You should use a thin layer of paint for your first try. A thick layer is not good for most prints.
-
You can get cool prints with easy tools. Try foam stamps, bubble wrap, leaves, or lace for nice feel and look.
-
Gelli plate printing helps you put in layers, feel, and a new touch to your fall art. Each one can be unique.
-
Start practice and share now. It helps your fall gel press plans grow and go well in time.
Introduction
If you want a simple way to make unique prints at home, gel printing is a good place to start. Gel press plates give you a fun printmaking method that feels creative. You do not need to have used this style before. With just a few tools, some paint, and found textures, you can make layered backgrounds, papers, and even fall-inspired looks. This guide will help you use gel press plates with more confidence and better control.
Understanding Gel Press Plates and Texture Printing Art
A gel press plate is soft and bends when you touch it. People use it for gel printing. You put paint on it, then press in lines or textures, and move the design to paper. It gives you an easy way to try out printing techniques. You do not need a press or special skills.
What makes this process helpful is how many things you can do with it. You can make kind prints, papers for collage, and media backgrounds. You only need basic things you can find in your home. Before you start to make prints, it's good to learn how the plate works. Knowing this will help you understand why it is so good for making texture printing art.
What Is a Gel Press Plate and How Does It Work?
A gel plate is a type of printing plate that you can use again and again. It is made from a sturdy material that feels like a gelatin plate. The surface is smooth and a bit sticky, so it grips paint very well. This surface will let go of the paint onto paper and show all of the details clearly. A lot of people use a Gel Press or gelli plate because it is simple to clean and easy to use. A gel plate will also work well each time you need it for printing.
Here is how it works. You first put a thin coat of paint on the plate. A brayer is often used for this. Then, you press in texture, pattern, or shapes with soft tools. After you are done, you place the paper on top. Next, you rub the paper gently. So, the paint moves from the surface to the paper.
That easy method is why gelli plate printing seems simple for many. A gel plate lets you make abstract art, choose fun layers, and try monoprints without any special tools. A lot of people are new to print work, but gelli plate printing helps them feel okay about starting. This makes it a no-stress way to try printmaking.
Exploring the Basics of Gel Mono Printing
Gel mono printing is a printmaking method where you make just one original piece from the plate. You do not get copies that are the same. Each print has its own marks, feel, and colors. That is why so many people enjoy gelli printing. Every time you pull a print, it feels new.
To start, you need a plate, acrylic paint, the paper, and a brayer. Roll out a thin layer of the paint. You can take some of the paint away or press something into it to make marks. After that, put the paper on top and then pull it off. You will often see lots of small, new details show up in the print.
This process helps you make beautiful prints because small changes can have a big effect. If you use less paint, pick a new tool for texture, or roll the paint a second time, the image can look very different. If you like to try new things, gelli prints are a good way to play and make something new.
Choosing the Right Gel Press Plate for Your Project
Not every gel press plate is right for every use. The one you choose will depend on what you want to print and how much room you have. Think about if you want to make quick test prints or bigger, more finished art pieces. Gel Press and Gelli Arts both have good choices you can use again and again.
When working on different projects, the size of the plate can be a big deal. A lot of new artists do not think about this. Some people like to use small prints. These are good for cards or when you want to make a collage. Other artists want a big surface. A large plate helps when you want to add layers to backgrounds. The next sections show these differences in a way that is easy to see.
Differences Between Plate Sizes and Shapes
Plate sizes and shapes change the way you work. A small plate is easy to use, takes less paint, and is not as overwhelming when you start to get into it. A big plate lets you make wide marks and work on larger pieces. This can also help when you want to make big designs or fill a full page.
Shapes are important too. Rectangles work well for most paper sizes. They are also good for mixed media work. Small sizes can be good for tags, cards, or when you want to test color. Some people like to try making homemade plates. A commercial plate is often easier to clean and lasts longer.
|
Plate Option |
Best Use |
|---|---|
|
Small plate sizes |
Practice prints, cards, tags, and quick tests for different projects |
|
Medium 8" x 10" style plate |
A balanced choice for beginners, collage papers, and regular art projects |
|
Large plate sizes |
Full backgrounds, layered prints, and larger pieces |
|
Rectangular shapes |
Easy alignment with the paper and useful for most studio work |
|
Homemade plates |
Experimental, but often less durable and less consistent than branded plates |
Selecting Gel Press Plates for Beginners
If you are new, gel press plates will be good for you. You do not have to have printmaking experience to make your first print. The process is simple, and it gets easier when you start with easy materials and a gel press plate that is not too big.
A medium plate, like an 8" x 10" size, can be a good way to start. It gives you enough room to try out different textures, but it will not feel too big. This size is also easy to use with most paper sizes. That helps you set up faster and not use more paper than you need while you learn about gel plate printing. A plate like this makes it simple as you get to know the world of gel plate printing.
Choosing a trusted product is important. Gel Press plates are strong, easy to clean, and give you good results you can depend on. If you buy from the brand’s store, you can get early access to deals and join the newsletter for offers. These small things can help make your first gel press plate feel more affordable.
Essential Supplies for Gel Mono Printing
Before you start to print, get a few things you must have. Gel mono printing does not need a big list of things, but the right basics help a lot. A good plate, some paint, the paper, and a brayer will help you print better and see clear detail.
When you have those basics ready, you can start to try different materials to add feel and make new marks. This is where the fun can really grow. You can use things from your home and simple art tools. These give you creative options but do not make things hard or cost a lot of money.
Must-Have Materials: Paints, Paper, and Brayers
Start with dependable printing supplies. You will need a gel plate and a soft rubber brayer. These tools help you spread paint evenly on the surface. For paint, use a heavy body student-grade acrylic paint. It gives bright color and good coverage. Some brands you can use are Amsterdam, Pebeo, and Liquitex Basics.
When you start, plain white copy paper is one of the best types of paper you can use. The paper is cheap and thin, so it is easy to press onto the plate. You can try other kinds later, such as cardstock, watercolor paper, deli paper, tissue paper, and more.
A strong beginner kit includes:
-
You will need a Gel Press or another gel printing plate.
-
Have some acrylic paint in a few colors.
-
You will also need a soft rubber brayer.
-
White copy paper is good for practice.
-
Get some soft tools to make marks with.
With these basics, you can start printing right away. This will help you build your skill before you buy more tools.
Fun Texture Tools: Foam Stamps, Bubble Wrap, Leaves, and Lace
Texture makes prints feel real and full of life. You do not have to buy costly tools to get this look. A lot of the best things to add texture are in the home or even outside in your yard. Soft things work well because they can leave clear marks on the plate but will not harm its surface.
Foam stamps are easy to use. You just press them and then lift them. Bubble wrap makes many circles over and over. Leaves can bring out the veins you see in nature. Lace adds thin lines and details. These different tools help you get many looks for your art. Some may look bold with strong design. Others can be soft or show layers. These tools are great when you want to plan for your work in the fall season.
Try these texture tools:
-
Foam stamps can help you make the same shapes again and again. They are good for playful designs and patterns.
-
You can use bubble wrap to get a dotted look. It also helps make a quick background.
-
Leaves let you use real shapes from nature. They are nice for prints during any season.
-
Lace makes soft and detailed surfaces. It adds a special look to your design.
Trying new things is part of the way to learn. So, keep your eyes open for safe things that have interesting edges and feel different to the touch.
Beginner’s Guide: How to Use Gel Press Plates for Stunning Texture Prints
Your first gel print does not have to be perfect for it to feel like a win. This printmaking method helps you see how paint moves and shows you what happens when you use different textures. It also lets you feel how pressure can change what you make. Gel press plates help you do this because they are easy to use and let you try new things without worry.
Start simple. Use just a few colors. Pick one tool for texture and start with basic paper. When you know these steps, you get many more creative options for making layered backgrounds, collage sheets, and art for different seasons. The next parts will show you the setup and printing steps in the right order.
Setting Up Your Workspace for Gel Mono Printing
A good setup will help you print easily from the start. Pick a flat surface that is strong and simple to wipe down. A lot of artists put a craft mat or an acrylic sheet on the table. This helps keep paint in one place and makes cleanup faster.
Get your workspace ready before you open your paint. Put your plate, brayer, paper, and all your texture tools close to you. This step helps a lot when you do gel printing because things move fast. If you need to stop and look for any tool, the paint might dry out before you can make your print.
Good lighting lets you see if your paint is going on thin and even. Natural light is the best, but you can also use overhead lights and a task lamp if you are in a home studio. Setting things up the right way will let you focus on printing. This means you will not have to fix problems you could avoid.
Step-by-Step Guide to Making Your First Gel Press Print
Making your first print with a gel press is not hard. You need to set the plate on the table. Add some small dots of paint. Then, use a brayer to roll out the paint. Make sure you have a thin and even layer. After that, press in a texture. Put the paper on top to finish your first print.
The right amount of paint is the most important thing to think about. If you use too much paint, it can make smudges and the details will not be clear. A thin coat will help to get sharper lines and a better transfer. If you like, you can press a soft sponge gently to add texture and make small, soft marks.
Use this simple order:
-
Add three to five small dots of paint to the plate.
-
Roll the paint thinly and even with your brayer.
-
Press in texture, then place the paper on top.
-
Rub the paper gentle and peel from one corner.
That is the main beat behind many good gelli prints.
Step 1: Applying Acrylic Paint Evenly to the Plate
Start with less acrylic paint than you feel you need. Put small dots of paint on the plate. Each dot should be the size of a dime or even less. Roll the dots out from the center. It is much easier to add paint later. It is hard to fix a plate if there is already too much paint on it. This simple choice helps your print look sharp and not muddy.
A soft rubber brayer is good for spreading paint in an even way. One way to do this is to roll the brayer through the dots first, and then go across the surface of the plate. Keep rolling until you see a thin and smooth layer on top. You want to cover the plate, but you do not want a thick layer.
Thin layers of paint often give the best results. This is because textures can show up more clearly. Thick layers of paint can make marks look soft and take away detail. If you are asking how much paint to use, start with a small amount. Add more only if you see the plate looks patchy.
Step 2: Creating Texture with Household and Natural Materials
After you roll out the paint, add texture right away. Press soft things from around the house or natural things into the paint while it is still wet. Items like bubble wrap, rims from takeout containers, leaves, lace, soft brushes, and sponges can all give a special look to the surface of the plate.
The goal is to move or take off paint so your print has clear lines and shows contrast. If a tool can lift the paint well, you will get clear lines and a pattern you can read. If your marks look muddy, there is probably too much paint on the plate. There could also be too much paint on your tool.
Keep things soft and safe so the plate does not get damaged. Sharp edges can make marks that will show up later when you print. If you want to do texture printing art for the season, you can use leaves and lace. They give good detail that works well for fall cards, collage pages, and media backgrounds.
Step 3: Laying and Lifting the Paper for Your Print
When the paper texture is ready, get the paper and line it up right. Put it down slowly onto the top of the plate. A lot of artists start by matching up the lower edge first. This makes it easier to place the sheet. It also helps later if they want to put on another layer. This small step can give you a cleaner print every time.
After you press the piece of paper on the paint, rub it gently. This helps the print paper touch the plate in all spots. You want the paper to make full contact without sliding. If the piece of paper slides too much, that may mean there is too much paint on the surface.
To see the image, start peeling from one corner and go slow. If you feel a bit of resistance, this is a good sign. It often shows that you got the paint level right. When you do this well, you get detailed designs, a clean feel, and the first pull is always very satisfying.
Creative Techniques for Advanced Texture Prints
Once you get good at doing one pull, you can try more advanced texture prints. At this stage, the process becomes deeper. Even if you use the same plate and paper, small changes in order, color, or material will make the results look very different.
Layering colors is a simple way to make your work better. You can add a second layer, mix textures, or try using shaped masks to build up your art. The next two parts will talk about some creative ways you can try that come from beginner steps.
Layering Colors, Stenciling, and Image Transfers
Layering colors is a smart way to add depth quickly. Do not stop after just one print. Let the first layer dry, then print again on top of it. Use thin layers of paint so each color can still show. This will make the surface feel light and lively, not heavy. It is a good way to make a simple pull look like a richer piece of art, with many layers of paint.
Stenciling helps you get clear shapes and lines. You can use a stencil on the plate before or after you roll out paint. It all depends on what effect you want to make. This step is simple, but it brings order to natural textures, like leaves, lace, or bubble wrap.
Image transfers are also talked about a lot in gel printing. Many artists use gel plates for this. If you want to try new ideas, you can mix image transfers with texture and color layers. Go slowly and add each one step by step. This way, it will be easier to see what each change does.
Using Multiple Textures for Unique Fall-Inspired Prints
Fall is a good time for texture printing art. It's smart to plan now, so your work or content will be ready when more people look for it. Many people use leaves, but you can make it even better by adding lace, foam stamps, or bubble wrap. Using more textures helps make strong contrast and adds more layers to the surface.
Try making fall prints by using one natural texture and one patterned texture together in the same piece. For example, you can press a leaf to get the vein shapes, then use lace to fill in the open spots. When you mix different materials like this, you get unique prints that feel just right for the season, but they do not look too expected.
These combinations can be used for different projects. You can make collage papers, use them for journal backgrounds, add to greeting cards, or create scrapbook pages. If you are looking to make repeatable seasonal content, a Gel Press plate lets you test out several fall ideas fast. You can also keep the good ones to use again later.
Caring for and Storing Your Gel Press Plates
Taking good care of your gel plate helps you get better results. It also protects your investment. Gel press plates are strong and last a long time, but you still need to handle them gently after each use. A few easy habits can keep the gel press clean and smooth. This will make sure the surface is ready for your next project.
Storing your plate the right way helps it stay in great shape for longer. Heat, dust, and rough handling can make it wear out faster. The next parts will give you some useful storage tips. They also tell you how to clean and store your plate so it stays safe and looks good.
Best Practices for Cleaning After Use
Cleaning a gel plate is easy if you do it right after you print. A damp cloth or baby wipes can remove most of the paint from the surface. For spots that will not come off, use mild soap and water. Wipe softly and do not scrub hard.
Try not to use harsh methods. Strong chemicals and hot water can hurt the plate or change its shape as time goes by. If you let dried paint sit too long, it will be much harder to clean. A simple wipe at the end of your session is a better way to keep things safe.
Use these basic cleaning habits:
-
Wipe fresh paint off with baby wipes or a damp cloth.
-
Use mild soap and water to clean any leftovers.
-
Dry everything with a clean towel or a paper towel.
-
Do not use strong chemicals or hot water.
Careful cleaning helps the plate stay strong for use again and again.
Safe Storage Tips to Extend Plate Life
Before you put your plate away, be sure that it is fully dry. If there is any water, it can cause problems over time, especially if you keep it in a warm room. When the plate is dry, put it on a flat surface. This helps the plate keep its shape. If you bend it or do not store it carefully, it can cause problems for your prints later on.
Where you store the plate is important. Keep it out of direct sunlight and away from heat. A dry place that is cool works best. The humidity level can change how long you can use it when printing, so do not put it somewhere that is damp.
For extra protection, keep the plate in a box or between covers. Some artists first dry the plate with a paper towel. Then, they place it flat and cover it to keep dust and dirt away. These simple steps can help keep your print quality good for a long time.
Conclusion
To sum up, working with Gel Press Plates can help people who love texture printing try many new ideas. When you learn about the different ways and tools you can use, you can make beautiful prints. You can find these designs in many seasons, but the fall can give you great ideas. You should try out different materials like foam stamps, bubble wrap, and things from nature, like leaves and lace. These can make your artwork stand out.
If you take good care of your Gel Press Plates, they will last a long time. You will be able to make bright and one-of-a-kind prints every year. If you want to know more about texture printing, you can ask for a free trial or talk to someone who can give you tips made just for you. This can help your art use gel press and other different materials in the best way.
Frequently Asked Questions
What types of paints or inks work best for gel mono printing?
For most beginners, the best choice for a gel press is acrylic paint. The source mentions several types of paint with strong color, like Amsterdam, Pebeo, and Liquitex Basics. If you use a thin layer of paint, you get the best results. A thin layer makes the texture easier to see. This is good when you are learning how to use different printing techniques and making several kind prints.
Can beginners use gel press plates for transferring drawings or images?
Yes, gel press plates are good for beginners. You can use them even if you just want to try image transfers. The process is easy. A gel printing plate is simple to use and clean. If you are just starting with gelli printing, try working with basic texture first. Add image transfers later, when you know how to work with paint and feel comfortable.
How do I prevent paint from sticking or tearing my print paper?
Use less paint than you feel you need. A thin layer on the printing plate is best. This lets the paper grip well and not slide. The paper should not get so wet that it smears or tears. The right amount of paint will make the paper pull away with a little effort. This is a good thing and shows you did it well.
Where can I buy authentic gel press plates online in the United States?
You can get real GelPress plates online from big art shops and brand stores in the United States.